Have you ever spotted a strange watermark on your ceiling? Might it signal roof damage? You’re not the only one thinking this. Fixing a leaky roof seems tough, but what if you could do it yourself? With some tools and advice, DIY roof repair is possible for non-pros. Homeowners can fix shingles and stop leaks from getting worse.
In this guide, we’ll show you six easy steps to handle minor roof damage yourself. Dealing with a leaky roof quickly is key to avoiding more trouble. We want to help you take care of your home’s upkeep confidently!

Key Takeaways
- Identifying and addressing a leaky shingle promptly can prevent extensive water damage.
- Homeowners can perform shingle repair with a straightforward DIY roof repair process.
- Six actionable steps to effectively fix leaks and safeguard your home.
- Necessary tools and materials you’ll need to have on hand.
- Understanding the underlying causes of roof leaks is key to preventing future issues.
Understanding the Cause of the Roof Leak
Before fixing anything, you need to know why your roof is leaking. Checking the roof carefully will help you spot what’s wrong. This process saves time and makes sure your repair will last.
Identifying Water Stains
Water stains often show where a leak is coming from. Look in your attic or on your ceiling for any discolored areas. These marks can tell you where the leak might be. Always follow the stains to their starting point, because the leak might not be right above the mark.
Checking for Damaged Shingles
Broken shingles are a top reason for roof leaks. Examine your roof for any shingles that are cracked, curled, or missing. These flaws can weaken your roof and let water inside. Feel for any granules that have come off, as this could mean it’s time for new shingles.
Inspecting Roofing Cement and Flash
Roofing cement and flash keep the edges of your roof sealed. If these materials break down, leaks can happen. Look for any cracks or damage in the roofing cement. Also, make sure the flashing is in good shape and in the right place. Not fixing damaged flash right away can lead to bigger problems.
Gathering the Necessary Tools and Materials
Before you start replacing your shingles, you need to collect all the right tools and materials. This preparation step makes the repair work go smoothly and lowers the chance of running into issues. Here are the essentials:
- Roofing Nails: Crucial for keeping your new shingles securely in place. Make sure to have enough galvanized roofing nails.
- Pry Bar: An important tool for easy removal of damaged shingles and nails. It helps in taking off the shingles without causing extra damage to the roof deck.
- Replacement Shingles: Choose shingles that match the existing ones in color and style. This keeps your house looking good.
- Caulk: Needed to seal the shingle edges to stop water from getting in. Choose a durable, weather-proof caulk for long-lasting results.
- Hammer and Utility Knife: You’ll also need a claw hammer for driving nails and a utility knife for trimming shingles to the right size. These tools help you do the job accurately.
Gathering these tools and materials in advance makes your shingle replacement project go smoothly and successfully. Being prepared helps you avoid delays and focus on getting your roof fixed without any trouble.
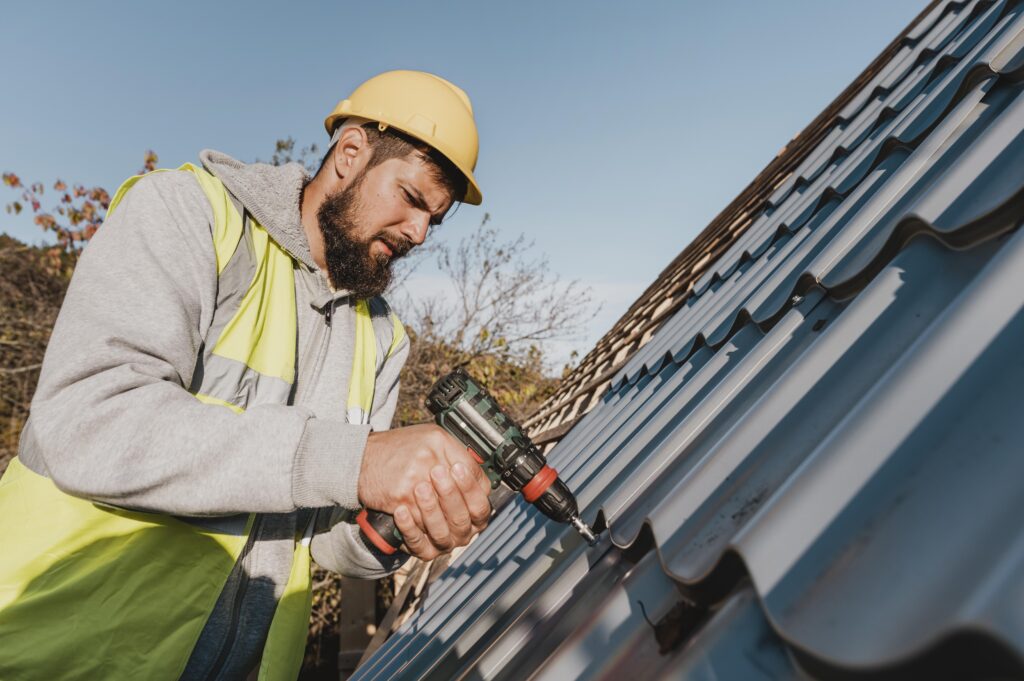
Safety Precautions Before Starting Roof Work
Before starting work on a roof, putting safety first is crucial. Taking necessary precautions helps avoid accidents and smooths the repair process.
Using a Sturdy Ladder
Having a sturdy ladder is key for safe roof entry. Always pick a ladder that’s in top shape and set it on a flat, firm ground. Make sure the ladder’s base is secure to avoid slipping, and if possible, have someone hold it for extra support.
Wearing Proper Safety Gear
Wearing the right safety equipment is critical for your protection on the roof. Dress in non-slip footwear, use a safety harness, and a helmet. These items reduce fall risks and other injuries, letting you concentrate on the job worry-free.
DIY roof repair: Step-by-Step Guide
Think fixing a leaky roof shingle is hard? This guide makes it easy. Just follow these simple steps to replace a bad shingle. This way, you can stop leaks from happening again.
Step 1: Removing the Damaged Shingle
First, take out the bad shingle. Lift the shingles near it gently. Use a pry bar to remove the adhesive and nails. Be careful not to hurt the shingles around it.
Step 2: Preparing the Area for a New Shingle
After removing the shingle, clean the spot well. Get rid of any old glue and bits of the old shingle. A clean area means the new shingle will stick better and seal tight.
Step 3: Installing the New Shingle

Now, put in the new shingle carefully, matching it with the ones next to it. The bottom should line up with the others. You might need to trim it so it fits just right.
Step 4: Securing the Shingle with Roofing Nails
To finish, nail the new shingle down. Put nails about 1 inch above the bottom and in the middle. This makes sure the shingle stays put and doesn’t create spots that could leak. Nail them down flat to avoid any raises.
Follow these instructions, and you can fix a leaky shingle to make your roof last longer. Check out the full guide for more help.
Common Mistakes to Avoid in Roof Repair
Starting a DIY roof repair can be fulfilling. Yet, it’s vital to know common slip-ups that might cause big issues. Paying attention to small details and doing thorough checks can prevent mistakes. These include roof damage and water issues.
Not Checking the Attic for Water Damage
Many people forget to check the attic when fixing the roof. Not looking at the attic can hide water damage. This happens because roof leaks often go down into the attic. Always look for moisture or mold signs there.
This is key. Fixing just the roof damage without dealing with attic problems can make leaks come back. And, cause more water damage.
Ignoring the Gutter and Vent Systems
Neglecting gutters and vents is another usual error. Gutters help move water away from your roof. If they are blocked, water can pool and hurt the roof. On the other hand, vents keep the air moving. Blocked or broken vents can lead to moisture issues and water damage. Be sure to keep gutters clean and vents working well to avoid these troubles.
When to Call a Professional Roofer
Fixing small roof issues yourself can feel good. But, sometimes, you need a pro’s help. Big problems on your roof are best looked at by someone skilled—a professional roofer.
When your roof keeps leaking, it’s a sign there’s a deeper problem. Not fixing leaks can cause worse issues, like your house getting damaged or mold growing. A skilled roofer will figure out why it’s leaking and fix it.

If your roof sags, you’re losing a lot of shingles, or bad weather has damaged it, it’s time for expert help. Roofers with experience have the right tools and know-how to fix things right, making your roof last longer.
Also, getting a pro to check your roof regularly can stop problems before they get big. A roofing contractor can spot early trouble signs during these checks. This keeps your home safe from sudden roof issues.
Maintenance Tips to Prevent Future Leaks
To make your roof last longer and stop leaks, keep up with maintenance. Checking your roof often and keeping gutters clean helps avoid damage.
Regular Roof Inspections
It’s important to check your roof often to find and fix small problems early. Have your roof checked twice a year, in spring and fall. Look for broken or missing shingles, cracks, and other signs of wear that can cause leaks.
Cleaning the Gutter System
Clean gutters are important for keeping water flowing away from your roof. Clean your gutters regularly to prevent water buildup that can harm your roof and house’s foundation. You might want to think about getting gutter guards to reduce debris and make cleaning easier.
Benefits of DIY Roof Repair
Doing roof repair by yourself has many benefits. It not just saves money but also lets you take charge of home care.
Cost Savings
Cost savings are a big plus of DIY roof repair. Hiring experts can really add up, with labor and materials costs. By doing it yourself, you slash these costs, saving a lot of money.
Enhanced Understanding of Your Roof’s Condition
Fixing your roof on your own means you’ll know it better. You’ll spot small issues before they get worse. This knowledge helps with both immediate fixes and future upkeep, guiding you to make smart repair choices.
Conclusion
Fixing your own roof can save money and keep your house dry. Knowing why roofs leak is key to fixing them right. Check for water stains and broken shingles to start.
Make sure you have the right tools and wear safety gear. A solid ladder and protective clothing are important. Follow the steps carefully, from removing the old shingle to nailing the new one down.
DIY roof work can cut down on costs and help you know more about your roof. But, for big problems, call a professional. Regularly checking your roof can prevent leaks and keep it in good condition. Doing it yourself empowers you to care for your home’s safety and durability.
FAQ
How do you identify water stains indicating a roof leak?
Check your attic or ceilings for water stains. They look like dark spots, showing where moisture has seeped in.
What are the signs of damaged shingles?
Look for shingles that are cracked, curled, or missing. They may also lose granules, weakening their protective ability.
How should I inspect roofing cement and flash for potential leaks?
Examine the roofing cement and flash closely. Search for any cracks, gaps, or signs of aging. These issues could let water in.
What tools and materials do I need for DIY roof repair?
You’ll need roofing nails, a pry bar, shingles for replacement, caulk, and roofing cement. These ensure a smooth repair.
What safety precautions should I take before starting roof work?
Use a solid ladder and make sure it’s secure. Always wear non-slip shoes and a safety harness for safety.
How do you remove a damaged shingle?
Lift the shingle above the damaged one with a pry bar. Then, take out the nails and slide the shingle out.
How do you prepare the area for a new shingle?
Clean the area where you removed the damaged shingle. Make sure it’s free of debris and check for water damage.
What’s the correct method to install a new shingle?
Put the new shingle in place, aligning it with others. It should be flush with the ones next to it for a neat look.
How do you secure the new shingle?
Fasten the new shingle with roofing nails, placing them above the tab slots. Make sure the nails are straight and even.
What common mistakes should be avoided in roof repair?
Don’t ignore the attic for water damage. Also, make sure to keep gutters and vents clean to avoid leaks.
When should you call a professional roofer instead of doing it yourself?
Hire a pro if the damage is big, like lots of missing shingles or major water damage. Or if you’re not sure how to fix it safely.
What are some maintenance tips to prevent future roof leaks?
Check your roof often for any damage and keep the gutters clean. This helps keep water away from your roof.
What are the benefits of DIY roof repair?
Doing it yourself saves money. It also helps you know more about your roof, leading to better upkeep and care.


